Thursday, 13 June 2013

Crumbs this is a Good Dessert!


I love Apple Crumble. If we go out for a meal and there is crumble on the menu I will normally choose it. At the weekend I will often make a crumble as a special treat for dessert. I remember it was one of he first things I learnt to cook at school in Home Economics. Apple crumble is my favourite and as we have two apple trees in our garden we will have a good supply of apples to see us through the winter. We wrap them in newspaper in the Autumn and store them in the garage. This will last us the rest of the year. Sometimes in September we pick blackberries and freeze them so I can use them in crumbles. Crumble is a very popular dessert in this country and is normally on the menu in most restaurants, usually in the form of apple and blackberry or rhubarb. A couple of years ago I came across a recipe for apple and banana crumble. This may seem an unusual idea but it works really well and is probably the favourite in our house. The sweetness of the banana contrasts really well with the tartness of the apples and it also means you do not need to add quite so much sugar to the filling.  It is nice with a few chopped dates mixed in too. There are many variations on the crumble topping. To the basic mix (flour, butter and sugar) you can add spices (ginger, mixed spice or cinnamon), nuts (flaked almonds, walnuts or pecans) or oats. You can also use soft brown sugar instead of castor and wholemeal flour instead of white. I don't normally use a lot of butter in my cooking (as it is high in saturated fat) but when I make a crumble I do think butter tastes better in the topping. I use a smaller amount and then bulk it out with some porridge oats.

Apple and Banana Crumble.
Serves 4
2 medium ripe bananas peeled and sliced
2 large cooking apples, peeled cored and chopped (about 500g in weight)
1 tbsp of soft brown sugar
6-8 dried pitted dates, chopped

100g  plain flour
50g butter cut into small pieces
50g castor sugar
30gr rolled porridge oats

Preheat the oven to 180C/Gas Mark 5
Put the apples, bananas and dates (if using) in an oven proof dish
Sprinkle over the sugar and stir to combine
Put the flour and  butter into a mixing bowl. Using fingertips rub together until it resembles fine breadcrumbs
Stir in the sugar and porridge oats and rub together again so the mixture is slightly lumpy and not dry
Sprinkle on top of the apple and bananas
Bake in the oven for 35-40 minutes until  the fruit is soft and the topping crisp and golden
Delicious served with a scoop of vanilla ice cream!

Wednesday, 5 June 2013

Yo Sushi!


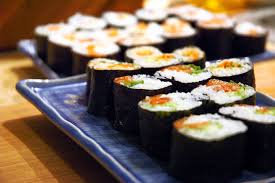
Have you tried making sushi before? It is something I first started making about a year ago. My husband and I spent an evening as a date night learning the art of sushi making through a Group On deal. It was great fun and I was surprised at how easy it was to make and also how tasty it was. It has inspired me to try other Japanese cooking. The Yo Sushi Cookery book has been a very good source for recipes. The main ingredients of Japanese cooking are rice, miso, mirin, wasabi, fish, green vegetables and seaweed. These are now widely available in the major supermarkets. (I have seen them in Asda, Sainsburys and Waitrose). If you make sushi regularly it is probably cheaper to order ingredients in larger quantities on-line. I have used sushisushi.co.uk before.  These ingredients are all healthy and low in calories. This probably explains why Japan is one of the healthiest countries in the world. It has the lowest obesity levels (5% of the population) and the highest life expectancy. Japanese cooking is in itself quite simple food and is prepared and eaten where possible in its natural form. 

The secret to good sushi is learning how to cook the rice. Sushi rice is high in starch and very sticky when cooked. In order to get rid of some of the starch it should be rinsed before cooking. It will take several rinses in cold water until the water becomes clear and should then be then left to drain. When cooking sushi rice the quantity of water is also important. It is always 10% more than the quantity of rice. eg. If you are cooking 100g of rice you need 110ml of water, This should be cold water placed in a thick based pan with a tight fitting lid. Place the lid on the pan and bring up to the boil (this takes 5-7 minutes). You must resist the urge to take the lid off and see how it is doing as it is important to keep the steam inside the pan. You will learn to hear when it is boiling. When the water has come up to the boil the rice will then need another 5-7 minutes to cook. The heat is then turned off and the rice left to cook for a further ten minutes in the steam from the pan. The lid still remains on.

Sushi vinegar is added to the cooked rice while it is still hot in order to create sushi rice. The three main ingredients for this are rice vinegar, sugar and salt. These are combined in a non metallic bowl and then stirred carefully into the rice with a spatula. Do not over stir or the rice will become mushy.

The fillings for sushi are very varied. People normally think of raw fish (salmon and tuna) but there are lots of vegetable fillings you can use (asparagus, avocado, pepper and cucumber). I have even seen a recipe in the Yo Sushi book for chocolate and mango sushi! (I haven't tried it yet!) You can also accompany any of these fillings with some wasabi paste. This is made from an aquatic plant in Japan and has a distinct strong flavour  like horseradish (beware you only need a small amount as it is very hot!)

To make the traditional sushi rolls (called maki) you will need a rolling mat. You can buy these from supermarkets as well (I have seen them in Waitrose and online with Ocado). This should be covered with cling-film to make it easier to roll the sushi.

Prepare the fillings that you are using and then you are ready to roll! As sushi rice is very sticky you will need to make a vinegar that you can dip your fingers into to keep them clean while you are making the Sushi . It is important not to use too much rice and to spread it out thinly (just under a cm thick). I find that if you use too much then it is hard to roll and won't end up looking so neat and delicate. Rolling does take practice.

When you are ready to eat put out some plates and chopsticks. Fill some bowls with soy sauce, toasted sesame seeds, which are great for dipping the sushi into.

If you haven't made Sushi before I hope this inspires you to give it a go. Not only is it delicious it is also very attractive and would be a great thing to serve if you were having friends round for a meal. It is also a fun thing to make with someone else and eat together.

Traditional Maki sushi
Makes 4 rolls (24 pieces)

240g Sushi rice
268ml of cold water
1 portion of sushi vinegar (see below)
1 portion of tezu vinegar (see below)
2 Nori sheets
Fillings of your choice. some good ideas are
Salmon and chives
Salmon and cucumber
Salmon and avocado
Avocado and sasame seeds
Cooked asparagus and sesame seeds
Fresh tuna
Red or yellow peppers

Sushi vinegar
25ml of rice vinegar
15g-25g of sugar (the amount of sugar varies depending on personal taste, but a less sweet vinegar is generally used for raw fish and a sweeter one for vegetables)
7g of salt
Combine these in a non metallic bowl and stir well until the sugar has dissolved

Tezu water vinegar
200ml of water
2 tablespoons of rice vinegar
1 teaspoon of salt
Combine these in a bowl and set aside

Cooking rice for Sushi
Rinse the rice through a sieve, draining away the milky water and repeat 3-5 times until the water runs clear. Leave to drain for an hour so that the rice has time to absorb moisture
Put the rice in a heavy based medium saucepan with the cold water
Place the lid on the pan and bring up to the boil (listen for boiling sound) which will take 5-7 minutes
Lower the heat to a gentle simmer and cook for another 5-7 minutes
Turn the heat off and leave the rice with the lid on for another 10 minutes
Transfer to a non metallic bowl and stir in the prepared sushi vinegar
Leave until cool enough to handle

Assembling Maki Rolls
Cover the rolling mats with clingfilm
Cut the nori sheets in half lengthwise
Place nori sheet on a rolling mat, shiny side down about 1cm from the edge of the mat closest to you and with equal space on each end
Wet your hands in the tezu vinegar
Take a handful of the sushi rice and gently press the rice in the centre of the nori sheet. Spread the rice thinly (just under a cm) leaving a cm strip along the top edge uncovered
Place your filling in the centre of the the rice
Use your thumbs to lift the edge of the rolling mat closest to you over the filling, forming it into a roll
Lift the top of the rolling mat and turn the roll a little to overlap the edges of the nori and seal the roll
When the edges come in contact they seal themselves
Roll again, exerting gentle pressure to ensure it will keep its shape and remain sealed
Remove from the rolling mat and use a very sharp knife to slice the roll into six equal segments
Repeat with the remaining ingredients (you may not need all the rice)
Chill for 2-3 hours or overnight
Serve with toasted sesame seeds, soy sauce and pickled ginger


Thursday, 30 May 2013

A Taste of Summer

I am often quite surprised at the palette of our 2 year old son and his willingness to try new flavours. I am fortunate that he has always been a good eater. He loves most foods apart from cheese (my husband and I don't like it either). He will happily eat olives, enjoy the sharpness of a lemon wedge and this week when I made sushi for tea he wanted to try the pickled ginger that we had as part of it. I thought it would be a bit strong for him but he ate it and asked for more! I am not sure I was as adventurous as him when I was a child. I remember a few things I didn't like, beetroot, cheese, eggs and rhubarb. We used to have a lot of rhubarb growing in our garden. I remember my Dad coming in with a bunch and my Mum making stewed rhubarb and custard for pudding, I had to have banana and custard instead. Its funny how tastes change, as I really enjoy rhubarb now. Last week my husband was doing some plastering for a client and he came home with a big bunch of it from their garden which I was really pleased with.

Rhubarb is in season from April to August, so when it starts appearing in the shops it is a sign that summer is on its way. It keeps in the fridge for 2-3 weeks and can also be frozen. If you want to freeze it I find it works better to stew it first (with a little sugar and orange juice) and then defrost it when you need it to use in rhubarb fool, or with custard.  Rhubarb crumble is a favourite dessert in our house. Recently I have enjoyed making some rhubarb crumble muffins that I found the recipe for in a magazine. Rhubarb goes well with ginger so in this recipe I added ground ginger to the crumble and stem ginger to the muffin mix. Rhubarb tastes really good in a fool with Greek yogurt. The recipe below is a favourite from Delia Smiths 'How to Cook Book Two'. 

l
Rhubarb Crumble Muffins.
Makes 12

Muffin Mix
175g/6oz castor sugar
175g/6oz rhubarb
2 tablespoons sunflower oil
1 egg
1 teaspoon vanilla extract
125ml/4floz buttermik (or you can use natural yogurt)
200g/7oz plain flour
1 tsp baking powder
1 tsp bicarbonate of soda
2 pieces of stem ginger finely chopped
Crumble mix
50g/2oz light brown sugar
50g/2oz plain flour
25g/1oz porridge oats
1tsp ground ginger
50g/2oz butter

Preheat the oven to 220C/Gas Mark 7
Line a 12 hole muffin pan with muffin cases
To make the crumble, mix together the sugar,flour,oats,and ground ginger
Rub in the butter with your fingertips until it forms light breadcrumbs. Set aside
Stir the rhubarb and sugar together
Stir the oil and egg into the sugary rhubarb
Add the flour, bicarbonate of soda, baking powder and stem ginger and stir well
Spoon into the cases and top with a thick layer of the crumble
Bake for 15-20 minutes until risen and golden
Cool on a wire rack
Keep in an airtight tin for 2-3 days
They also freeze well

Rhubarb Ginger Fool 
Serves 4
570g/1lb 4oz fhubarb
75g/3oz castor sugar
1 teaspooon chopped fresh root ginger
200g/7oz 0 per cent or 2 per cent fat Greek yoghurt
2 pieces of stem ginger

Preheat the oven to 180C/Gas Mark 4
Trim and wash the rhubarb and cut it into 1 inch (2.5 cm) chunks
Then place it in a baking dish, sprinkle with the sugar and add the chopped fresh root ginger
 Bake it in the oven, without covering, for about 30-40 minutes or until it's tender but still has some shape
Drain the rhubarb, by tipping it into a sieve set over a bowl to drain off the excess juice
Place it in a food processor and whizz to a thick purée
After that, transfer it to a bowl and leave aside to get quite cold
Next empty the yoghurt into another bowl and fold half the purée into it, then divide the mixture between four serving glasses and spoon the remaining purée on top
Cut the pieces of stem ginger into small chunks and use them to garnish each fool
Cover with cling film and chill for 2-3 hours or until ready to serve

Sunday, 26 May 2013

Rice 'n' Easy

Did you know there are 40,000 types of rice in the world?! I was amazed to find this when I Googled it. Most of these are produced in Asia and 19 varieties are found in most countries. There are 3 main types. Short grain has a high starch content which has a soft and sticky texture when cooked. It is used in Japanese cooking to make Sushi. Medium grain rice is used in risotto and paella and is good at absorbing flavours. Long grain rice has less starch so is firmer in texture when cooked. It is used in Indian and Thai cuisine such as Basmati and Jasmine rice.


Arborio Rice used in risotto is named after the town of Arborio where it is grown. When cooked it has a creamy texture around a chewy centre. One of my favourite quick and easy meals is risotto. It is made in one pan and to the basic risotto mix of onion, rice and stock you can add meat, fish or vegetables of your choice. You can be as creative as you like.

Risotto is often viewed as a hard dish to make. It isn't once you have mastered a few basic principles. Firstly you need to buy risotto rice which you will find in the supermarket called arborio or carnaroli. I tend to use arborio rice and have found that supermarket own brands are just as good as the branded version. You begin by frying a finely chopped onion in a little olive oil or butter (I prefer to use oil) and then add the rice. Once this is coated in the oil you start adding the stock a ladleful at a time. The stock needs to stay on the boil otherwise the risotto will take longer to cook. I have found the best way to do this is to put the stock in a small pan and keep it at a gentle simmer on the hob. This can then be added to the risotto as needed. I always make extra stock than the recipe states just in case it requires a bit more to be cooked. The most important thing with risotto is that it needs regular stirring. You don't need to stir it continuously but it is a dish where you need to stay with it and stir every couple of minutes or so. This helps the rice thicken and cook evenly. I find it is best cooked in a large shallow pan as this helps the rice cook more evenly. 

Three of my favourite Risotto's are Salmon and Pea, Roasted Butternut with Parmesan and Haddock with Butternut. Below is the basic risotto recipe which is used in all three. 

Basic Risotto recipe
Serves 4
1-2 teaspoons Olive Oil
1 onion peeled and finely chopped
300g Arborio rice
1 litre of vegetable stock (you may not need all of it)

Heat the oil in a large shallow pan
Add the onion and cook over a gentle heat for 5-10 minutes
Add the rice and stir to coat in the oil
Add a ladleful of stock and bring to a simmer
Cook and stir until all the stock has been absorbed
Continue to add the stock a ladleful at a time and keep stirring, until all the stock has been absorbed or the rice is cooked. It should be tender with a bit of a firmness in the centre when you taste it
Add the other ingredients and seasoning according to recipes below


Salmon and Pea
1 large tin of red salmon drained
150g frozen peas defrosted
1 tbsp light cream cheese
Stir these into the cooked risotto and heat through

Roasted Butternut and Parmesan 
1 teaspoon of olive oil
500g butternut peeled and chopped into chunks
2 garlic cloves (leave unpeeled and whole)
1 tbsp fresh thyme
40g parmesan

Heat oven to 200C/Gas Mark 6
Place the butternut, garlic and half a tablespoon of thyme in a large roasting pan with a teaspoon of olive oil
Stir to coat in the oil
Cook for 30-40 minutes until tender and golden
Add the rest of the thyme at the same time as adding the rice to the pan
Add the roasted butternut (discard the garlic) and parmesan to the cooked risotto and heat through

Haddock and Butternut
For this recipe use half the amount of roasted butternut and leave out the thyme.
When the risotto is cooked stir through the butternut with 250g of cooked smoked haddock and a couple of spring onions or a tablespoon of chopped fresh chives


Wednesday, 22 May 2013

Turkish Delight


Last weekend my husband and I spent the Saturday afternoon in Kingston. He needed to visit a triathlon store there to get some kit for his first triathlon competition in a few weeks time. I was looking for an outfit for a wedding. After a successful afternoon shopping we made our way to a Turkish restaurant where I had made a reservation for dinner. It was a great evening and the food was superb and very good value. We opted for the mezze set menu which was £19.50 each and included a starter, main and dessert. The starter was a variety of dips with some fresh homemade bread and also mini lamb kofte's and lambs liver. For main we then had a selection of chargrilled meats and kebabs with rice and salad. The chargrilled taste on the meat was really delicious and there was a really good selection of meat and lots of it.  We had an assortment of Turkish desserts.  They were thankfully quite small portions to share as I was still full from the main course!


One of the desserts was Baklava. This is layers of filo pastry filled with chopped nuts (usually walnuts or pistachios) and sweetened with syrup or honey. I have always wanted to make it myself at home but thought it was quite hard to do. However this week I found a recipe in one of my River Cottage cookbooks (Hugh Fearnleys Three Good Things) and decided to have a go. It is a lot easier than I had thought, especially as you use ready made filo pastry. I like Feulles de Filo which is a French brand. It comes in a pack of 12 thin layers. The important thing to remember with filo pastry is that it dries out very quickly so while you are preparing the dish you should keep it covered with foil or a damp tea towel. Hughs' recipe uses walnuts, lemon zest and sugar for the filling. Walnuts are an excellent source of healthy fats. They are high in monounsaturated fats and essential omega 3. Just 25g of walnuts a day provides 90% of your daily intake of these essential fats. They are also an excellent source of Vitamin E, B, and Iron. The recipe uses 90g of butter which you use to brush the filo pastry with before layering them in the dish. As butter is quite high in saturated fat I was intrigued to see whether I would be able to use a little less butter but without compromising on the taste. I decided to melt only 45g of butter and see how far this would spread over the layers of pastry. In the end I found that I actually only used 25g of butter. While the pastry is cooking you make a syrup using sugar, honey and lemon juice. This is then poured over the cooked pastry. You then need to leave it to cool and for the syrup to completely soak into the pastry. Hugh recommends 8 hours. So if you are making this for a dinner party you would need to bear this in mind. 

The finished dessert was delicious and it didn't seem to affect the taste or flavour using only a quarter of the butter from the original recipe. Baklava freezes well. Cut into slices and wrap in baking parchment and foil. It needs only a short time to defrost before serving (30 minutes is more than enough) and I found it can even be served straight from the freezer. It is nice served with Greek yogurt or a scoop of vanilla ice cream. 

Baklava
Makes 9-12 slices
125g walnuts
25g of castor sugar
Finely grated zest of a lemon
25g of butter melted
125g of ready made filo pastry

For the honey syrup
75g of honey
75g of castor sugar
Juice of 1 lemon

Preheat the oven to 160C/Gas Mark 3
Put the walnuts, sugar and lemon zest in small blender and pulse a few times until the nuts are fairly finely chopped
Brush a little of the butter over the base of a dish or baking tin. I used a pyrex dish that was 18 cm square but Hugh says to use a baking tin about 15cm by 10cm. Obviously that meant that mine was slightly shallower and needed less cooking time but it still worked fine. So you can choose one or the other depending on what you have available
Lay half the filo sheets in the pan, brushing each layer with butter and folding them over and tucking them so that each layer fits neatly
Spread the walnut filling over it
Layer the remaining pastry over it, spreading with butter as before
Cut the last couple of layers of pastry so that they fit neatly on top
Brush with a layer of butter
Use a sharp knife to cut through the first 2 layers of pastry into squares, triangles or diamonds. I cut mine into 9 squares. Bake for 20-40 minutes until crispy and golden
Meanwhile make the syrup. Put the honey and sugar in a small pan
Put the lemon juice in a jug and make up to 150ml with water
Strain through a sieve into the pan
Bring to the boil, stirring to dissolve the sugar. Boil for 5-10 minutes until the syrup is reduced and thickened
When the pastry is cooked, remove it from the oven and pour the hot syrup evenly over it
Leave in the tin for 8 hours for the syrup to soak and settle
Cut into slices using a serrated knife
Serve with greek yogurt or a scoop of vanilla ice cream.......Delightful.


Saturday, 18 May 2013

Why Don't You Turn off the TV and Do Something Less Boring Instead ?

This week Delia Smith announced her retirement from broadcasting after 40 years as one of the Uk's leading TV chefs. She has always been a bit of a hero of mine. Over the years I have purchased most of her cookery books (and made a lot of the recipes). I have also avidly watched all of her cookery TV series. I found her recipes not only delicious but straightforward and easy to follow. They don't have a long list of ingredients that you can't find in the supermarket and you don't have to be a chef to make them. It is good home cooking she delivers that we should all be able to achieve.

As a young child you would find me in the kitchen helping my Mum make fairy cakes and jam tarts. As I grew up this interest in cooking developed further. I loved baking. I also took an interest in helping my mum plan and cook our meals and by 13 I was cooking the Sunday roast while my mum went to church. Home Economics was my favourite subject at school and the one subject I achieved an A in at GCSE. When I left home and went to University I enjoyed having friends round at the weekend for meals. I loved spending time reading through cookery books planning the menus and I was always trying new recipes whenever I could. It wasn't just about the food though. It was also about the friendships formed and the conversations shared as we sat around the table. Sometimes that was over a bowl of tinned tomato soup. Now as a busy Wife and Mum I enjoy cooking easy, delicious and healthy meals for us as a family. I really want to inspire other people in that too. I was encouraged to read in the Telegraph this week that cookery lessons are to become a compulsory part of the school curriculum again. It was a shame they were ever dropped. They taught us not only how to cook but a little bit about nutrition as well. I enjoy cooking with our two year old son. I hope that he grows up with an ability to be able too cook for himself and enjoys it too. Delia Smith has recently launched an on-line cookery school. One of her reasons for this is 'that nobody teaches people how to cook anymore' She said that modern cookery shows presented TV as theatre rather than teaching the basics. I can see where she is coming from. There are so many cookery programmes on TV- Masterchef, The Great British Bake off, Ready Steady Cook, But how many of us actually cook any of the recipes we see them do? Do most people sit down after a hard days work with their microwave meal simply wanting to be entertained by these programmes? And do they build confidence in peoples ability to cook or simply teach them to be a food critic. Like Delia Smith I am keen to inspire people to cook and to build confidence to know that they can do it. That is one of the reasons I started writing this blog. I am not looking to be a chef or claim that all the recipes I post are my own, but I do hope that my posts encourage people to 'have a go' at the recipes and realise that cooking delicious food is not just for a talented few but something we can all achieve and enjoy. Along with this I want to show that cooking delicious food can be healthy too. We live in an age where we are faced with so many food choices. Many of then are not that healthy, hence the term 'junk food'.

You really can't beat the satisfaction of eating something you have made yourself from scratch and to know that you and your family are eating quality food that is doing you good as well. I would love to hear from you if you have tried any of the recipes I have posted and I also hope this post encourages you this week to have a go at one of them too if you haven't yet. Please comment on blog or email fivestarfuel.cm@gmail.com 

Tuesday, 14 May 2013

Potatoes My Sweet?

Let me introduce you to the humble sweet potato. These bright orange fleshed potatoes sometimes known as yams can be used in very much the same way as regular white fleshed potatoes (baked, mashed or roasted). They make delicious potato wedges and are also great in soups and vegetable curries. Sweet potatoes have some good health benefits over regular white and yellow fleshed potatoes. Firstly they are an excellent antioxidant as they are a very good source of beta cartotene (Vitamin A). One medium sweet potato will provide you with your recommended daily amount of Vitamin A.  They are also rich in vitamin C and E.  Sweet Potatoes have twice as much fibre as a white potato and a lower GI rating. Which means that the energy is released into your body more slowly and so you will feel full up and satisfied for longer. People often think that potatoes are fattening and that you should avoid them if you are trying to lose weight but 100g of sweet potato only has 93 calories compared to 230 calories in a standard portion of rice (65g)


I only started cooking with sweet potatoes a few years ago when I started having an organic vegetable box delivered each week. It has been a good way of getting to try vegetables I may not of thought of buying in the shops before and also experimenting with cooking them too. This week the box contained two large sweet potatoes.  I used one of them in a Mexican soup. The sweet potato formed the base of the soup along with onion and stock.  Once these ingredients were cooked they were blended. I then added some chopped red pepper, sweetcorn and red chilli. The sweet potato added a natural sweetness to the soup which compliments the spice of the chilli. An avocado salsa would work well as a topping. (mix together chopped coriander lime juice and diced avocado) I served it with some homemade sourdough bread but I think some tortilla chips would be nice too. With the other sweet potato I made some spicy sweet potato and sweetcorn burgers. These are really tasty and flavoursome and my husband and I were suprised how good a burger that does not contain meat can be. We enjoyed them in a burger bun with some sweet chilli sauce and I served them with homemade coleslaw. 

Mexican Sweet Potato Soup
Serves 4

1 tsp of vegetable oil
1 small onion diced
1 large sweet potato peeled and diced
1 tablespoon of plain flour
670ml (1 1/4 pint) of vegetable stock
150g of sweetcorn fresh, frozen or canned
1 small red pepper deeseded and diced
1/2 a red chilli finely chopped

avocado salsa to serve (optional)
1/2 an avocado diced
1 tbsp lime juice
1 tablespoon of chopped coriander


Heat the oil in a large saucepan. Add the onion and sweet potato then sweat for 5 minutes over a low heat
Add the flour and cook for a minute
Add the vegetable stock, bring to the boil, then cover and simmer gently for 10-15 minutes until tender
Blend until smooth
Add the sweetcorn, red pepper and chilli and simmer for another 5 minutes
Season with ground black pepper
Make the avocado salsa by mixing together the avocado, lime juice and coriander. 
Serve the soup with the salsa and bread or a few tortilla chips


Sweet Potato and Sweetcorn Burgers


Makes 4-5

3 large sweet potatoes about 750g
1 teaspoon of vegetable oil
1 red onion finely chopped
1 red chilli finely chopped
1/2 tablespoon of ground coriander
1/2 tablespoon of ground cumin
165g can of sweetcorn, drained
tablespoon of chopped coriander
100g polenta
burger buns, chilli sauce and salad leaves to serve

Heat the oven to 200C/Gas Mark 6.
Pierce the sweet potatoes and place them on a baking tray
Bake for 45 mins until soft
Leave to cool 
Meanwhile heat the oil in a small pan, add the onions and chilli and cook until soft
Peel the potatoes and mash together with  the onions and chillies and the spices
Add the sweetcorn, coriander and 50g of the polenta
Season with ground black pepper
Shape into 4-5 round burgers 
Dip into the remaining polenta and chill for at least 15-20 minutes 
You can either cook them in the oven 220C/Gas Mark 7 for 15 minutes, or for 5 minutes in a George Foreman or on a griddle pan
Serve in burger buns with chilli sauce and salad leaves